GKE (Google Kubernetes Engine) is Google Cloud's managed Kubernetes service. Like EKS (Elastic Kubernetes Service) and AKS (Azure Kubernetes Service), it runs the control plane for you. The GKE-specific question, and the one that actually shapes your day-to-day experience, is which mode you run your nodes in: Autopilot or Standard.
That choice determines who manages your nodes, how you get billed, and what you're allowed to do on the underlying infrastructure. Pick wrong and you're either fighting the platform's guardrails or babysitting infrastructure you didn't want to own.
Autopilot versus Standard
In Standard mode, you manage the worker nodes. You choose machine types, configure node pools, set up autoscaling, and handle node upgrades. You can SSH into nodes, run DaemonSets, configure custom kubelet settings, and use hardware like GPUs (graphics processing units) or TPUs (tensor processing units). You're billed for the VM instances in your node pools whether your pods use them or not, plus a flat cluster management fee.
In Autopilot mode, Google manages the nodes too. You write Kubernetes manifests, GKE provisions the compute. You never touch nodes directly. For general purpose workloads you pay for the CPU, memory, and ephemeral storage your pods request, not for underlying VMs that might sit half idle.
Google positions Autopilot as the recommended default. The cluster inherits their hardened configuration and operational best practices without you having to wire any of it up.
How billing works in each mode
Both modes charge a flat cluster management fee of $0.10 per hour (roughly $73/month), billed per second. Google offsets this with a $74.40/month free tier credit per billing account, which is enough to cover one Autopilot or zonal Standard cluster. After that credit is used up, normal rates apply.
Where billing diverges is the compute. In Standard mode, you pay for the Compute Engine VMs backing your node pools at their listed instance pricing, regardless of how much of their capacity your pods actually use. If your nodes are 50% utilized, you're paying for 100% of the VM. The savings opportunities are familiar cloud cost levers: right-size your instance types, use Spot VMs for fault-tolerant workloads (up to 60–91% discount depending on the machine family), and commit to 1- or 3-year resource-based committed use discounts (CUDs) for predictable baselines.
In Autopilot mode, you're billed per second for the CPU, memory, and ephemeral storage that your running pods request. There's no idle node line item because you never see the nodes. But Autopilot also adds system overhead per pod (typically around 180m CPU and 512Mi memory), and that overhead counts toward your bill even if your container uses less. If you're not paying attention to resource requests, Autopilot's billing can be surprisingly high, because over-requested pods cost exactly what they request, not what they consume. Autopilot supports Spot Pods and Flex CUDs (which cover Compute Engine, Autopilot, and Cloud Run) for cost reduction.
The crossover point between the two models depends on utilization. If your Standard nodes consistently run at 80%+ utilization with well-packed pods, Standard is often cheaper per unit of compute. For teams with variable or moderate workloads that don't want to spend engineering time tuning bin-packing, Autopilot eliminates idle capacity from the equation entirely. The expensive mistake is running an untuned Standard cluster with half-empty nodes, or paying Autopilot's per-request premium for a workload you would have packed tightly anyway.
The Autopilot constraints you need to know about
Autopilot's hands-off experience comes from enforcing a set of restrictions. They aren't arbitrary; Google is managing the underlying nodes and needs them to stay secure and stable. But they will surprise you if you migrate a workload that assumed full node access.
The one that catches people first: you can't SSH into nodes. Privileged containers are blocked by default unless you're using a verified partner or allowlisted workload, and host networking isn't available.
Resource requests are also enforced. On Standard, if you deploy a pod without resource requests, Kubernetes schedules it anyway with reduced priority. On Autopilot, requests are required. If your pod doesn't meet minimum thresholds, Autopilot bumps the requests up for you. This catches a common mistake before it causes a noisy neighbor incident, but it also means your billing reflects what Autopilot set, not what you intended.
On top of that, Autopilot sets limits equal to requests by default, so pods can't burst above their requested resources. The exception is burstable workloads: if a pod sets a limit higher than its request on a cluster that supports bursting, it can temporarily consume spare capacity beyond what it requested (and is billed for). If you rely on burstable pods that occasionally spike past their requests and aren't using burstable mode, set requests high enough to cover the peak or you'll see throttling.
If your workload needs any of the capabilities Autopilot blocks (privileged access, host networking, custom kernel modules, a specific kubelet config), use Standard for that workload.
Security defaults
One of the less-discussed reasons to consider Autopilot is its security posture. On Standard clusters, features like Workload Identity, Shielded GKE Nodes, and automatic node upgrades are available but optional; you can disable them for backward compatibility. On Autopilot, Google started fresh and removed all of the less-secure options. Workload Identity, Shielded Nodes, Container-Optimized OS, and auto-upgrades are always on and can't be turned off.
Autopilot also routes all pod network traffic through your Virtual Private Cloud (VPC) firewall rules by default, even pod-to-pod traffic within the same cluster. On Standard, you'd need to enable Dataplane V2 and configure network policies yourself to get equivalent enforcement.
For teams operating under compliance requirements or running multi-tenant clusters, this matters. The security controls that Autopilot enforces by default are roughly the same ones the GKE hardening guide recommends applying manually to Standard clusters. Autopilot just makes them non-negotiable.
Release channels and upgrades
GKE uses release channels to manage Kubernetes version upgrades across your clusters. There are four: Rapid, Regular (the default), Stable, and Extended.
New Kubernetes minor versions land in Rapid first, typically one to two months after the upstream open source release. Patch versions move faster, usually appearing within days to a couple of weeks. After accumulating usage and proving stable across Rapid clusters, a minor version promotes to Regular (roughly two months later), and then Stable (another three to four months). Each promotion signals a graduating level of confidence based on observed cluster behavior. Critical security patches go out to all channels simultaneously.
Autopilot clusters are always enrolled in a release channel, and their nodes always upgrade to match the control plane version. You don't manage node versions. Standard clusters default to the Regular channel but can opt into Extended, which provides the same minor version for longer (approximately 24 months of total support: 14 months of standard support plus 10 months of extended support). Extended is only available for Standard clusters, and after standard support ends, you pay a surcharge for the extended period.
The practical consideration: control plane upgrades are automatic in both modes and you can't disable them. What you can control is timing (maintenance windows and exclusions). If a Kubernetes release removes an API version your manifests depend on, GKE will upgrade right over it. Auditing for deprecated APIs before each upgrade cycle is your job in both modes.
Networking
GKE clusters are VPC-native by default, meaning pods get IP addresses from secondary ranges in your VPC rather than from a cluster-internal overlay. In Autopilot clusters, VPC-native mode is always on.
For the data plane, GKE offers Dataplane V2, which replaces the traditional iptables/kube-proxy stack with extended Berkeley Packet Filter (eBPF) programs built on Cilium. New Autopilot clusters (version 1.22.7 and later) have Dataplane V2 enabled by default. Standard clusters can opt in at creation time. The practical difference: eBPF handles packet processing in kernel space, which scales better than iptables as the number of services grows, and it enables built-in network policy enforcement and network-level observability without installing additional tools.
If you're creating a new cluster and don't have a specific reason to avoid it, Dataplane V2 is worth enabling on Standard as well. The observability it provides for debugging pod-to-pod connectivity issues alone makes it useful.
You no longer have to pick one mode for the whole cluster
This used to be an either/or decision at cluster creation time. GKE now lets you run Autopilot-managed workloads inside a Standard cluster using ComputeClasses.
A ComputeClass is a Kubernetes custom resource that defines a list of node configurations (machine types, feature settings, Spot VM preferences). You select a ComputeClass in your workload spec. If that ComputeClass has the autopilot field enabled, GKE runs the pods in Autopilot mode, and Google manages the nodes it creates with the default Autopilot security settings.
What this gets you: a Standard cluster where you keep node-level control for the workloads that need it (DaemonSets, hardware tuning), with Google fully managing the stateless services that don't. Standard node pools and Autopilot-managed nodes in the same cluster.
Which mode should you pick
Default to Autopilot. It applies Google's hardened configuration, patches nodes on your maintenance schedule, and bills per pod request. Cost forecasting is simpler when you're not reasoning about node VM utilization.
Reach for Standard when you have a concrete reason: you need SSH access to nodes, privileged workloads with host networking, custom kubelet settings, or you've done the math and a heavily utilized, carefully packed node pool is cheaper than per-pod billing at your scale. Reserved or committed-use node VMs can win on cost for steady, predictable workloads.
If only some of your workloads need that control, use a Standard cluster with Autopilot ComputeClasses for the rest rather than splitting into two clusters.
Final thoughts
GKE gives you a managed control plane and two ways to handle the data plane. Autopilot takes the nodes off your plate entirely, with enforced security defaults, per-pod billing, and automatic upgrades. Standard gives you full access to the node layer when you need it. ComputeClasses let you mix both in a single cluster. The billing model, security posture, release channel, and networking stack all follow from that initial mode choice, so it's worth getting right before you start deploying workloads.
Whichever mode you choose, GKE abstracts away the control plane but not your responsibility for understanding what your workloads are doing. Per-pod billing in Autopilot turns resource requests into a direct cost lever. Over-requested pods quietly inflate your bill; under-requested ones get throttled. Watching request versus usage over time is what keeps a GKE cluster both healthy and affordable. If you're evaluating what Kubernetes monitoring involves, the short version is that you need visibility into both the cluster infrastructure and the workloads running on it.
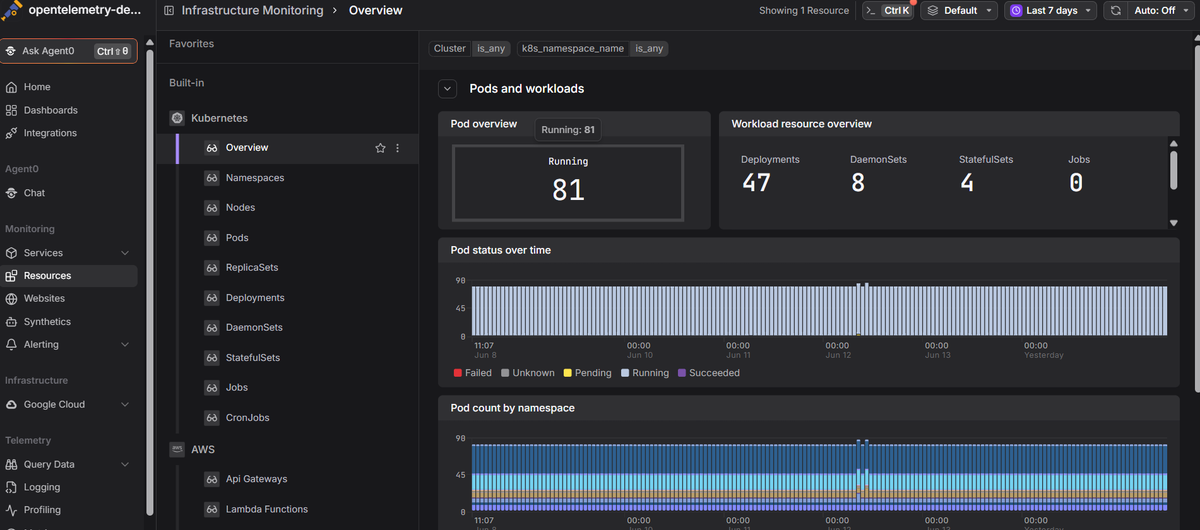
Dash0's Google Cloud monitoring and Kubernetes monitoring give you OpenTelemetry-native visibility into your GKE clusters, from infrastructure metrics down to pod health, resource usage, real-time logs, and distributed traces. The Dash0 Kubernetes Operator handles instrumentation for both Standard and Autopilot clusters, so you can diagnose issues from one place regardless of which mode your workloads run in.
 Start a free trial to see your GKE metrics, logs, and traces in one view. No credit card required. For a broader comparison of monitoring options, see our guide to Kubernetes monitoring tools.