Every Docker image you build stacks an OS base layer, system libraries, a language runtime, and your application dependencies — and any of them can carry known CVEs (Common Vulnerabilities and Exposures). A scanner works by extracting a software inventory from every image layer, then cross-referencing each package against vulnerability databases like NVD, OSV, and distro-specific advisories. This article walks through the three tools that cover most teams (Trivy, Grype, and Docker Scout) and shows how to wire them into a CI pipeline so vulnerable images never reach production.
Prerequisites
Before following along, you'll need:
- Docker Engine to build and run images
- A Docker image to scan (the examples use
myapp:latest) - macOS or a Debian/Ubuntu Linux host for the install commands shown
- For the Docker Scout section: Docker Desktop 4.17 or later, or the standalone Scout CLI plugin (install instructions inline below)
Trivy and Grype install steps are covered inline below. No prior scanner experience is assumed.
What a scanner actually checks
Before picking a tool, it helps to know what they look at. Most scanners inspect two categories of packages.
OS packages are the apt/dpkg packages on Debian/Ubuntu images, apk packages on Alpine, or rpm packages on RHEL/Amazon Linux. These live in the base layer and are a common source of stale CVEs.
Application dependencies are npm packages, PyPI packages, Gems, Maven artifacts, Go modules. Scanners detect these from lockfiles, node_modules/, or site-packages/ directories baked into the image.
Neither category alone is sufficient. An image with a pristine Alpine base can still carry a critical CVE in a transitive npm dependency, and vice versa.
Scanning with Trivy
Trivy (by Aqua Security) is one of the most widely adopted open-source container scanners, with over 30,000 GitHub stars and broad adoption in the CNCF ecosystem. It runs as a single binary with no daemon required, and covers OS packages, language dependencies, misconfigurations, and secrets in one tool.
Install it on macOS or Linux:
1234567891011# macOSbrew install trivy# Linux (Debian/Ubuntu)sudo apt-get install -y wget apt-transport-https gnupgwget -qO - https://aquasecurity.github.io/trivy-repo/deb/public.key \| gpg --dearmor \| sudo tee /usr/share/keyrings/trivy.gpg > /dev/nullecho "deb [signed-by=/usr/share/keyrings/trivy.gpg] https://aquasecurity.github.io/trivy-repo/deb generic main" \| sudo tee -a /etc/apt/sources.list.d/trivy.listsudo apt-get update && sudo apt-get install -y trivy
Run your first scan against a local image:
1trivy image myapp:latest
The output lists every detected package alongside its CVE ID, severity, installed version, and fixed version:
12345678910myapp:latest (debian 12.5)Total: 12 (UNKNOWN: 0, LOW: 7, MEDIUM: 3, HIGH: 2, CRITICAL: 0)┌───────────────┬────────────────┬──────────┬───────────────────┬───────────────┬──────────────────────────────────────┐│ Library │ Vulnerability │ Severity │ Installed Version │ Fixed Version │ Title │├───────────────┼────────────────┼──────────┼───────────────────┼───────────────┼──────────────────────────────────────┤│ libssl3 │ CVE-2024-5535 │ HIGH │ 3.0.11-1~deb12u2 │ 3.0.13-1 │ OpenSSL: SSL_select_next_proto buf...││ ... │ ... │ ... │ ... │ ... │ ... │└───────────────┴────────────────┴──────────┴───────────────────┴───────────────┴──────────────────────────────────────┘
For CI usage, filter to what actually matters and fail the build on serious findings. The first command exits with a non-zero code if any CRITICAL CVE is found; the second outputs JSON for downstream processing:
12345# Fail if any CRITICAL vulnerability is foundtrivy image --exit-code 1 --severity CRITICAL myapp:latest# Filter to HIGH and CRITICAL, output JSON for downstream processingtrivy image --severity HIGH,CRITICAL --format json --output results.json myapp:latest
Trivy can also catch problems before you build at all. This command checks your Dockerfile for misconfigurations like running as root or using ADD instead of COPY for local files:
1trivy config ./Dockerfile
Scanning with Grype
Grype (by Anchore) is another strong open-source option, particularly popular in teams that also generate SBOMs (Software Bill of Materials). The two tools use different vulnerability databases and detection heuristics, so running both on critical images catches more than either would alone. If you're only going to run one scanner, Trivy's broader misconfiguration coverage gives it an edge for most teams. If compliance or SBOM generation matters, Grype is worth adding.
Install Grype:
12345# macOSbrew install grype# Linuxcurl -sSfL https://raw.githubusercontent.com/anchore/grype/main/install.sh | sh -s -- -b /usr/local/bin
Run a basic scan:
1grype myapp:latest
For CI pipelines, the --fail-on flag is useful. The command below fails the build only when there are vulnerabilities with available fixes, which avoids blocking on CVEs your base image vendor has already assessed and won't patch:
1grype myapp:latest --only-fixed --fail-on high
Grype pairs well with Syft, Anchore's SBOM generator. The two-step approach below lets you store the SBOM as a build artifact and re-scan it later against updated databases without rebuilding the image. This is worth doing for any compliance workflow where you need an auditable record of exactly what shipped, because "we scanned it when we built it" isn't enough when new CVEs are disclosed weeks later.
123# Generate an SBOM in CycloneDX format, then scan itsyft myapp:latest -o cyclonedx-json > sbom.cdx.jsongrype sbom:./sbom.cdx.json --fail-on high
The CycloneDX format produced here is an open standard maintained by OWASP and is widely supported by compliance tooling.
Scanning with Docker Scout
Docker Scout is Docker's native scanner. It ships pre-installed with Docker Desktop 4.17 and later — if your team is already on Docker Desktop, it needs no additional installation. On Docker Engine without Desktop (typical for Linux servers and CI runners), install the Scout CLI plugin first:
1curl -fsSL https://raw.githubusercontent.com/docker/scout-cli/main/install.sh | sh
Once installed:
1234567891011# Quick vulnerability overviewdocker scout quickview myapp:latest# Full CVE listdocker scout cves myapp:latest# Filter to fixable critical/high CVEs onlydocker scout cves --only-fixed --only-severity critical,high myapp:latest# Compare two versions to see what changeddocker scout compare myapp:v2 --to myapp:v1
Docker Scout's strength is the developer experience. It surfaces fix recommendations alongside CVE data and integrates directly into Docker Hub. The free tier covers unlimited public images and a limited number of private repositories, which is enough for individual developers or small teams. For broader private repo coverage, it becomes a paid product.
CI pipeline integration
Automating scans in CI is where the real value is. Running a scan locally before you push is useful, but it's easy to skip. A CI gate is not.
GitHub Actions with Trivy
The workflow below builds your image, scans it with Trivy, and uploads results to GitHub's Security tab in SARIF format. The if: always() on the upload step is important: it ensures scan results appear even when the build fails, so you can see what was found rather than just that something was found.
12345678910111213141516171819202122232425262728293031323334name: Container scanon:push:branches: [main]pull_request:jobs:scan:runs-on: ubuntu-latestpermissions:security-events: writecontents: readsteps:- name: Checkoutuses: actions/checkout@v4- name: Build imagerun: docker build -t myapp:${{ github.sha }} .- name: Scan with Trivyuses: aquasecurity/trivy-action@v0.36.0with:image-ref: myapp:${{ github.sha }}exit-code: "1"severity: "CRITICAL,HIGH"format: "sarif"output: "trivy-results.sarif"- name: Upload results to GitHub Security tabuses: github/codeql-action/upload-sarif@v3if: always()with:sarif_file: trivy-results.sarif
GitHub Actions with Grype
For teams using Grype, the anchore/scan-action step below produces a SARIF report and fails the build at the severity threshold you choose:
12345678910111213- name: Scan image with Grypeuses: anchore/scan-action@v7id: scanwith:image: myapp:${{ github.sha }}fail-build: trueseverity-cutoff: high- name: Upload SARIF reportuses: github/codeql-action/upload-sarif@v3if: always()with:sarif_file: ${{ steps.scan.outputs.sarif }}
Pin actions to commit SHAs
For production workflows, pin third-party actions to a full commit SHA rather than a version tag. Tags are mutable — aquasecurity/trivy-action had its tags force-pushed during a March 2026 supply-chain attack, and Anchore's scan-action README explicitly recommends SHA pinning as a security best practice. With SHA pinning, the commit you reviewed is the commit that runs:
12- name: Scan with Trivyuses: aquasecurity/trivy-action@<full-40-char-sha> # v0.36.0
Grab the full SHA from the release page on GitHub (Releases → v0.36.0 → the commit hash next to the tag), or use Dependabot, which writes the full SHA for you and opens a PR every time the upstream tag moves so you can review the diff before it lands.
Multi-stage build tip
If you're using multi-stage builds (and you should be), scan only the final stage that actually ships. Build stages often contain compilers, test frameworks, and build tools that carry their own CVEs but never reach production. Target the production stage explicitly before scanning:
12docker build --target production -t myapp:prod .trivy image myapp:prod
Common pitfalls
Ignore unfixed vulnerabilities
Many OS vendors triage CVEs and mark some as will not fix because the vulnerability isn't exploitable in their configuration, or because a backport isn't feasible. If you don't filter these out, your CI reports fill with noise and engineers start ignoring everything, including the CVEs that matter. Use --ignore-unfixed in Trivy or --only-fixed in Grype when running CI gates.
Scanning :latest in CI
The same :latest tag can pull a different image digest on Tuesday than it did on Monday, which means your scan results don't correspond to a specific build. Pin your base images to specific digests in your Dockerfile (FROM node:20-alpine@sha256:...) so the image you scan is the image you ship.
Assuming a clean scan stays clean
Vulnerability databases update constantly. An image you scanned two weeks ago may now have critical CVEs from newly disclosed vulnerabilities. Set up scheduled re-scans against your registry (Trivy supports scanning images directly from registries) to catch new disclosures between builds. The worst place to learn about a critical CVE is from someone else's security report.
False positives vary by scanner
Trivy and Grype use different vulnerability databases and match packages differently. On some images, one will report a vulnerability the other doesn't. For high-stakes images, run both and reconcile the differences rather than picking one and assuming it catches everything.
Final thoughts
You now have three scanners to choose from, a CI workflow for each, and the context to avoid the most common mistakes. The practical starting point for most teams is Trivy in CI with --ignore-unfixed and a CRITICAL/HIGH threshold, then add Grype if you need SBOM generation or compliance coverage.
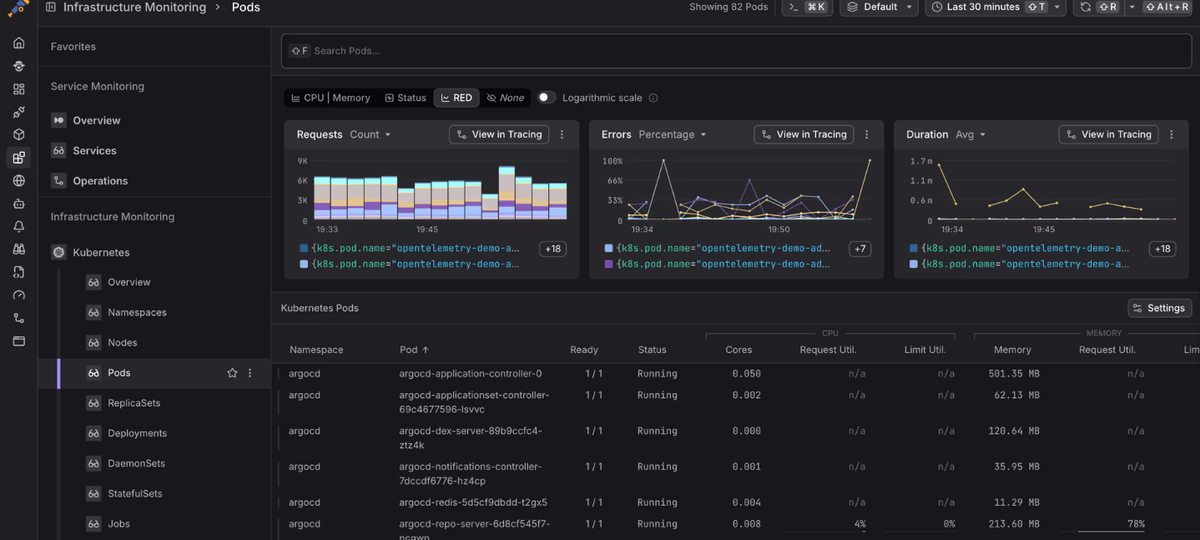
The next gap to close is connecting scan results to what's actually running. A critical CVE in an image deployed across a hundred pods is a different problem than the same CVE in an internal tool that gets one request per day. Dash0's Kubernetes monitoring gives you a live view of which containers are running which image versions. You can split by container.image.tags to see exactly which image versions are active across your workloads, alongside resource metrics, logs, and distributed traces. Cross-referencing that with your scanner output tells you where a newly disclosed CVE is actually deployed, rather than reasoning from a static image inventory. More detail on what Dash0 collects from Kubernetes workloads is in the integration overview.
 Start a free trial to see your container fleet in one view. No credit card required.